Wednesday, December 19, 2012

Dreadnought is done!

These things might be futzy to paint but they're also quick.  Relatively speaking, that is.   Then again I'm painting to a tabletop level and I'm trying to impress anyone but me.

It may not come across well in the pictures but the ring on the back of the ship and the "windows" on the particle accelerator on the bridge are painted in a blue-green.  Looking at the pictures it seems to be too close to the blue on the rest of the ship but in person it does stand out.

You can see the turrets in the background.  Once I get this one varnished I'll take some pictures with the turrets in place and with some of the escort ships.


Tuesday, December 18, 2012

Dreadnought half way done

I decided to move on to one of the larger ships.  Because they look cool.  Turns out they used all that space to put details everywhere.

This ship has 2 different types of turret - regular ordnance and energy weapons.  I decided to magnetize the turrets so I could swap them out.  I also decided to magnetize the bridge section so it would be shorter.  I was careful but not careful enough.  Of course I screwed up the polarity of one of the magnet pairs.  Luckily it was the bridge so I'll epoxy it down when the ship is painted.  Lesson learned because the battleship can run immersed and the bridge section is put into a clear template.


The plan is to put a wash into the circular part on the bridge and paint the ring in the back to represent Element 270.  Which means blue-green.  Otherwise it's going to be lots of the light blue wash in all the nooks and crannies.

Thursday, December 13, 2012

Ships - Fini!

Gee, once I figured it out these painted up rather quick.  The trick seems to be KISS.  Good painting skills are still essential since brush control is important due to the amount of detail that doesn't get painted.  It makes sense, really.

Step 1 - Base coat and metal

I put a white base coat over everything.  Go with thin coats so the detail doesn't get clogged up.  Then I painted everything that would be metal.  And after that I touched up the white to clean up where the paint went awry.


Step 2 - Brown wash

The deck and the metal was given a brown wash.  The deck got touched up a bit where it dried spotty.  The brown wash also took care of lining those areas that needed it.  The last steps were using the brown wash in the details to make them stand out more and touching up the white.  Again.


Step 3 - Blue shadows

I wanted to do a cool blue-toned white.  That's why the first attempts had blue hulls.  I achieved the same type of effect by using a pale blue in the shadows.  And I touched up the white.


Step 4 - Element 270 (Sturginium)

The fluff has the magic rock as a glowing blue-green.  I wasn't going to do OSL on these so I put a dot of the color in the bottom of the smokestacks.

Monday, December 10, 2012

Ships - I didn't get it

Last night I started work on the hulls. My intent was to bring up the white with washes.  Turns out I was incorrect in my technique.

Once again I have discovered that the ways I paint minis are not suitable for these kind of minis.

I'm going to test the idea of how I'm going to get a shadow on these without having a darker base coat.  Since they will be taking another trip into the Simple Green I can test directly on the minis instead of getting to that point and finding it won't work.

I'm not thrilled about redoing these minis a third time but I also knew that I would be using them as a learning experience.  Oh, I've learned all right.

I'm also going to try changing the deck color to something lighter so the metal stands out.  The one I have now looks great but it's too close to the brass and when they're together nothing stands out.  I have a couple of ideas and I'll test them before I start over.  I'm debating between a very, very light tan or plain white - both with the brown washes.   I think I know which one will look better but I have to try them both to be sure.

On a better note I received my rare earth magnets so I can plan on starting the larger ships once I figure out the painting methods.  I'll be using magnets to hold the airships on the flight stands (removable for storage) and for the alternate weapons available to ships.  I'll probably keep the bridge separate as well since they came that way.  It will also make the ships less prone to damage during transport.

Ah well.  Live and learn.  Then blog about what went wrong so other people can use what I've done.

Saturday, December 8, 2012

Ships, Take 2

This time I think I got it.  Fewer colors, more washes.

For the hull I'm going with a blue base coat so I can work it up to white.  This hasn't changed from the original color scheme.


You can see the wash around the parts that are going to be gold, once I get to them.  I wanted these to stand out.  You'll also notice the rivets didn't get the same treatment. See my previous post about getting too caught up in the details.


This is the wooden deck.  I do like the way the space between the boards pops when I added the brown wash.  Two coats of wash because the first one just didn't have enough emphasis.  Not all the ships have a wooden deck but for those that do this will work nicely.

Everything that is still white and some parts that are blue got painted with the metallic base coat last night.  I need to touch up a few places with the original blue and then I'm ready to do finishing work.  Yes, finishing work so soon.  I did say I was overworking these paint jobs the first time around.

Wednesday, December 5, 2012

And into the Simple Green they went

The little ships are much different from painting minis.  There's a lot of great detail on these but it turns out not all of it gets painted.  Weird.

My ships went into the Simple Green bath last night and are now sitting here in spiffy new coats of primer.  I also couldn't glue them onto craft sticks like other mini.  That made it very difficult to get to areas to paint.  They're now on individual bottle caps and I used poster tack to hold them in place.  The resin is very slick and the glue didn't 'take'.  Live and learn.

My paint scheme idea was about 75% good.  Problems included, but were not limited to, having too many colors and trying to paint too many things.  I'm going to take silver and grey out of the mix and do the blue-white and gold.  The "power source" is a blue-green per the fluff so that will be in there as well but shouldn't look that bad.  It's not in a lot of places but it is there.

I also painted some of the areas out of order.  That one was my fault entirely.  I know better than that.

The experience I gained will serve me in good stead.  I also looked at some of the larger ships and found out what will work better on the smaller ones.  Some of the detail just isn't there on the larger ones so I don't have to worry about it as much on the small ones.  This pleases me.

Tonight I hope to at least put on the blue base coat again.  That will take 2 coats since I need to put on thin layers.  It would be too easy to clog up the fine detail and I use thin layers anyway.  If I get that done then I'll shade the areas that will get the gold detail.  That will be plenty for one night and will get me started on them again.

I'll try to take pictures of them this time around and post WIP shots as I go.  My guess is that I won't be using the Simple Green again but even if I do it's good to see what happened and why it didn't work.

Monday, December 3, 2012

Painting little ships is .. different

Sorry - no pictures just yet.  I'm not ready to post progress.  I do have a reputation to uphold after all.

I'm still working on the Spartan Games Dystopian Wars Covenant of Antarctica frigates and I'm using them as a test of the color scheme and how to paint the things.  Already I'm finding out what details are important to paint and which ones aren't.  So I've "wasted" a fair amount of time painting bits that I'm now painting over.  Learning experience, right?

That's why I started with the group of frigates.  They're small enough that they'll get lost in the mass of ships and painting a set of them lets me see how it all works.  I'm not exactly happy with them but not unhappy enough to strip and start over.

I think the color scheme is going to work well once I get through the process.  I'm going with blue-white (to match the faction flag) and I'm trying something new to me.  I have a light blue that is both the darkest color for the white and the lightest color for the blue.  I don't think I can get much more coordinated than that.

By the way - silver rivets on white are NOT worth the effort.  I shall not be making that effort/mistake on the rest of them.

Once this army is done I picked up a Russian Coalition one.  If I match their flag I'll be painting red and black.  Two difficult colors I would never use in an army.  Or a navy.  Or an air force.  We all know I'll find a way to work them in at least as accent colors but geez.  Red and black?

Friday, November 16, 2012

Happy early Christmas to me

I only get presents if I buy them for myself.  That's the way it goes.  I decided that I didn't need anything this year so I wasn't planning on anything.

Having said that it seems like I bought myself some early presents.  The guys here have been playing Dystopian Wars and I figured I might as well get an army and give it a shot.  My present to myself is the rulebook and an army.  Yes, another army to paint.

I've been wanting to paint up vehicles and this is the perfect game to do that.  I'll have to see if there are canon color schemes or if I can just have fun.

This might also be a chance for me to play with my airbrush.  I've got some 40K vehicles that could benefit from it as well.  And maybe some Litko bases since I'll have it set up.

I believe this makes army #5 in need of paint.  And my dungeon crawl minis.

Tuesday, October 30, 2012

Maybe some 15mm again?

I finally gave in and bought a copy of Napoleon's Battles from Lost Battalion Games.  This seems to be the baseline rules for Napoleonic games and there's almost always a chance of getting a game going.

I barely got any of my 15mm based for Lasalle so rebasing for Nappy's Battles won't be much work.  Finishing painting however will be.

I've got some motivation to paint now that I have a goal.  If nothing else it would be nice to have them done and packed in travel cases.  It means ordering more bases since these are different sizes from Lasalle.  A Litko order is in the near future for me.  I'm still counting how many bases I'll need.

I went back to one of my old blog posts since I knew I had done a breakdown of how many minis I had for this army.  It was better than digging them out and counting. Again.

Saturday, September 22, 2012

Update without much content

The subject warned you.

I finally bought an air compressor to go with the air brush I bought off Craigslist a while ago.  The airbrush is new and a pretty basic double action.  The compressor is a decent one.  I got very good deals on both of them which is only to be expected.  I want to try doing the base coat of my Hirst pieces with the airbrush to see if I can get one-coat coverage and not have to go back and do touchups like I have every time I've used a brush.  I also want to try doing the base coats of large minis.

I've been fairly active getting my business RastlWorld Minis going.  My two most difficult tasks are doing the research for new minis and finding enough sculptors to get them done.

Otherwise I haven't been doing anything hobby-wise.

Thursday, August 2, 2012

I painted!

Actually I painted twice but I don't consider a black ink wash "painting".

Tonight I pulled out the kobolds I started painting about a year ago and finally fixed the colors.  I picked the wrong color way back in the beginning for part of the figures and then stopped painting.  I thought fixing and finishing those would be a good way to get started again.

Tonight was just the base coat to start those areas again but it's progress.  I think I need to get stronger reading glasses to paint now but that's just a trip to the dollar store.

Did it feel good to paint?  Kinda.  Not being able to see them as well as I used to was frustrating and repainting is never fun.  But it's a start and that's what matters.  These are dungeon crawl minis so I'm not overly concerned about a bit of stray paint.

Sunday, July 15, 2012

Sneak peek

OK, this is more of a "sneak look at it" than a peek but what the heck.

This may or may not have something to do with my super secret project.


So how do these compare to this?

Monday, June 18, 2012

I've been such a slacker

I know there's a bunch of stuff I need to do for this blog.  Most of it centers around terrain.

So far the list is:

  • Create instructions and pictures for making my modular dungon

  • Write the dungeon crawl convention/single play rules.  (I received permission from the original designer to make a 'fan based' version.)

  • Write the dungeon crawl convention/single play PVP rules.  Yep.  Two sets of adventurers.

  • Write a whole lotta tutorials on faux stone painting.  I have 10 on my list.  I'm waiting on some smooth floor tiles from Naloomi's Workshop since they're the best thing I've found for the tutorials.

  • Other stuff I've probably forgotten.


Bear with me and I'll get these done.  Eventually.

Let me know if there's anything else you've seen me make for terrain and you're interested in knowing how.

Thursday, June 14, 2012

Semi Super Secret Project

It's only semi secret since I've been telling some people about it.  I'll leave it secret here until it's further along.

Tonight was spent doing the initial mold line removal and polishing of 3 horse figures.  I remembered how much I dislike using steel wool to prep minis.  It's messy and frankly annoying.  I need to take it to that level because they'll be recast twice before being "done".  I will be speaking with my caster about the best methods to minimize shrinkage in casting.

Tequila and cleaning minis still don't mix well, in case you were wondering.

On a final note to hint at what the semi super secret project may be if anyone is big into 28mm historical wargames drop me a line.  I may have questions for you.  And that's all you're gonna get for a while on this topic.

Tuesday, May 8, 2012

I built stuff

Yes, I built stuff.  And I painted stuff last weekend too.

I have a gothic arena that I started back in 2009, I think.  It may have been 2010.  Whatever.  It was a while ago and it has been sitting, rather forlorn, in a box.  I needed to feel productive so I pulled it out to paint.  I also have some additional pieces for my modular dungeon that I built almost a year ago and never painted.

While I was painting I found some of the arena pieces weren't as well constructed as I would have liked and some had been damaged in the moves.  Tonight I dug out the bins of appropriate bricks and built not only the replacements but a couple of new ones.  I'm mixing the basic and advanced arenas so eventually I need to figure out what's left to build.  I think I have all the basic pieces.

Here's proof I built.


It takes a heck of a lot more glue than you would think to build this stuff.  I probably should have thrown that out before taking the picture.

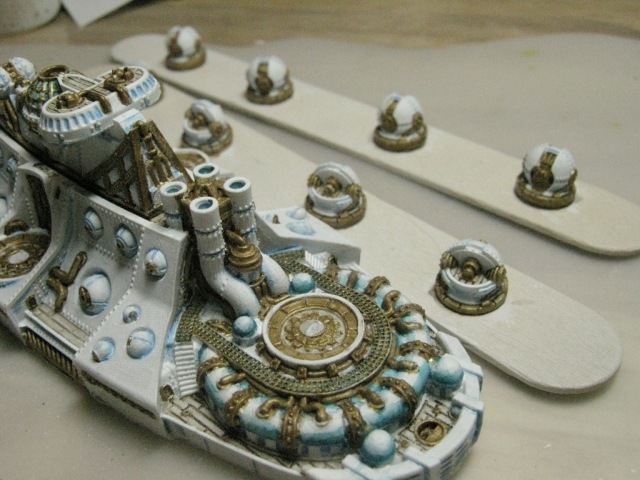
I do a lot of building on my homemade magnet board.  That's a steel baking pan sitting on a piece of countertop.  (I used to be able to buy the sink cutouts - fantastic for solid surfaces).  The pieces of wood have magnets glued into holes - you can see one of them upside down in the upper right.  I can't remember where I found the instructions to do that.  I do remember the time it took to align the radial arm saw to as close to a perfect 90 degree cut as possible.  That took a while but it's worth it.

I also build using my Lego as braces and alignment blocks.  To be honest mine are Brix Blocks, the Sears equivalent to Lego.  I've had them since I was a kid and I'm still playing with them.

I'll let these dry for a few days and then probably put paint on them this weekend when I do the touchups on the pieces I already base coated.  And the touchups on the pieces I touched up when I painted last weekend.  At some point I do move beyond the base coat.  Really.

Saturday, May 5, 2012

The other side of the rant on competition painting

I ranted previously about painters who wimp out when it comes to honest critique and competition.  To be fair now I shall rant about the other side of that coin.

Judging is by its very nature subjective.  Even with that "Open Judging" system it's still a judge's opinion.  Blatant things like inadequate prep, messy paint and other very basic problems are easy enough to ding.  It's the judging after that I'm going to rant about.

Everyone has a different style of painting.  This is a good thing.  Where it becomes a less good thing is when Judge A prefers Painting Style 1.  That judge has a bias against every other style of painting whether they admit it or not.  Therefore they will give higher scores to minis that conform to Painting Style 1.  Typically it's the preferred painting style of that judge too.

This has actually been discussed by painters.  The artistic aspect of the mini tends to get lost in the "we need to judge against a technical standard" in open judging.  It's all well and good that someone knows how to prep a mini and stay within the lines.  It's much more difficult to say "I like this" without any reason other than it appeals to you.  That isn't what open judging is about.

Trophy competition is just that - competition.  There's 11 minis and the best 3 are given trophies.  Does that discourage the painters who didn't win?  Possibly.  Giving out handfuls of medals also isn't encouraging since you see all the other painters being given the same thing as you without any real reason why unless you can corner a judge and ask.

Sunday, April 22, 2012

Sculpting is hard

Yeah.  I know.  Big surprise.

Right now I'm working on learning how to work with epoxy putty and try to make something humanoid actually look humanoid.  It isn't nearly as easy as you might think.

Until I have something that isn't actively embarrassing I won't be posting any pics.  I have some pride.

Sunday, April 1, 2012

I may be slightly active again

Don't get your hopes up too much.  It's all very much in the beginning phases of doing stuff again.

So far I have a local game store asking about Saturday paint lessons/sessions/clinics/etc.  I had to break away from the teaching I had been doing for a few reasons but oddly enough I enjoy it when I have eager (and teachable) students.  By 'teachable' I mean 'willing to learn'.  I've just contacted them to let them know that this might be possible so we'll see where it goes.

I also thought some terrain building classes might be fun.  The problem with terrain is that it generally takes at least 2 sessions due to setting and drying time.  My immediate thoughts were small Hirst Arts projects and the pipe cleaner trees I made in the past.  Useful and not too difficult.

On top of all that I'm making my very first attempts to sculpt minis.  There's a reason for this but I won't get into that now.  My first challenge is making the metal wire armatures.  "Twist the wire like this" doesn't sound that hard but for me it is.  Metal hates me and getting both a smooth twist and a twist that's the correct size in the correct place is not as easy as the pictures make it out to be.  I shall be twisting and cursing at more than a few pieces of wire while I get this right.

Until I can make consistent armatures I'm not even thinking of putting putty on anything.  I did take the time to find the sculpting tools I made when I still had access to the workshop.  It looks like between those and my standard sculpting tools I have enough to make a good start.  There's someone on etsy who makes similar tools so I can get different ones if I need them.

Lastly if I have a good relationship with this store and their customers there's a chance I could set up a regular time to run my dungeon crawl.  After I finish revising the rules, revising the encounters, and painting all the necessary minis.  I even have an idea for a PVP version but would need someone to help me run it.

Yes, Rastl may be back!

Thursday, January 26, 2012

Rastl is on hiatus

I make terrain and paint minis to play games.  They're toys.

I'm not currently playing any games so I don't have a reason to make terrain or paint minis.

I may eventually pick up the project of the modular dungeon again but for now it's packed away along with all the other projects.  If so I'll post about it here of course.