
Each step is less and less surface area to paint. Yay! This time it was the silver for anything I want to be metal. It's painted over black to give it some depth. Rather than doing large group pictures going forward I'll be showing smaller batches since details will start to matter soon.

The Megatrakk Scrapjet has the metal on it. I'm not really sure how I'm going to paint the treads yet so those are still black. I forgot to get a side picture to show the tread workings but since it's been further painted I don't want to muddle up the order. There's a lot of silver in there too.
I'm trying very hard not to let the layer lines bother me but I have a feeling that these will be retired in favor of resin printed ones at some point in the future unless I can minimize how those layer lines stand out. For now they stay. This taught me lessons in patience about printing thinner layers even though it takes longer, and I've done that with other vehicles going forward.


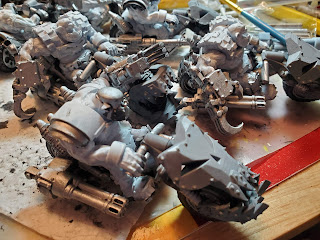
The Nob Bikers with their power claws (which haven't been seen before). The claw arms are magnetized so I can swap out weapons and because of that they're painted separately. That's why they weren't shown before.
I was bothered by the rectangular block on the back wheel/tread area (see previous posts for those) because it didn't seem right. Finally I realized I had forgotten to print the guns. Sigh. I hadn't even prepared the files for printing. Those got printed, I stripped the paint off the contact areas on the bikes, painted the guns up separate, then attached them. I have to touch up the joins but they're out of the way enough not to matter that much. Forgetting the guns. Sheesh.
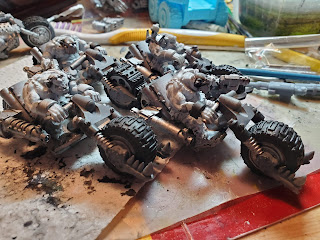


A different set of warbikers which adds variety. I prefer a variety in my troops and luckily I can get it with 3D printing them. One of these guys isn't behaving at all when it comes to attaching the front wheel assembly. I have it pinned and even now it's a bit loose. Once it's on the base it will be fine but I need to be a bit careful when handling it. I don't like him.


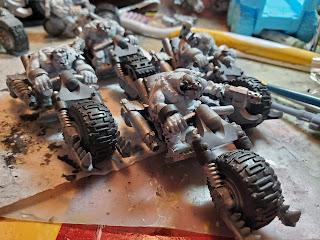
Yet another different set of warbikers. I don't quite understand the metal plates wrapping around the tires but I guess it's an ork thing. I'll be doing some weathering on those when the painting is done. These have a space for a gun to be attached to their back and I had an extra so the center guy got two. His grots like him better.

I still really like the unusual aspect of a trike with two wheels in the front. It's way front heavy because I didn't hollow those out when I printed them and I won't make that mistake if I print another. I probably won't because these don't have a lot on the table at once and I have different versions if I want another one.
I didn't magnetize his claw arm because he only has one arm option. I could have done it but the other one I have right now has a claw on that arm too. Seems like this fella likes his power claw.
I touched up the black after painting the silver but I know I'll have to keep touching up things as I paint. It's part of life. Going forward I'll be using craft paint for silver rather than the expensive stuff. Silver is silver and these things eat paint and brushes. I bought more cheap craft paint brushes too.
The silver that's on it is Army Painter Plate Mail Metal. It covered great in one coat.
The Games Workshop Way is to pick out details on metal with a bronze/copper color. I did a little of that and painted over it. I'm not sure how I'm going to pick out the details on these yet. There's a nice amount of detail on the weapons so I'll have some fun with it.
Next up will be painting yellow because most vehicles are used in Evil Sunz clan games and their color is yellow. Yes, I know red makes things go faster but that's more a Goff color. Yes, I know Goffs tend to be painted black more than red until you get into the bigger guys. But yellow it is and it's the next largest color block.
Yellow sucks to paint and I'm very sure you're going to be reading a lot about how yellow sucks to paint in the next post.
No comments:
Post a Comment